Tuesday, September 26, 2017

Mean Imputation in Apache Spark

If you are interested in building predictive models on Big Data, then there is a good chance you are looking to use Apache Spark. Either with MLLib or one of the growing number of machine learning extensions built to work with Spark such as Elephas which lets you use Keras and Spark together.

For all its flexibility, you will find certain things about working with Spark a little tedious.

For one thing you will have to write a lot of boilerplate code to clean and prepare features before training models. MLLib only accepts numerical data, and will not handle NULL values. There are some great library functions for String indexing and One Hot Encoding. However, you will still need to explicitly apply all these functions yourself. Compared with using a product like H2O, which does all this via configuration options in the model, writing this code can be a chore.

As frustrating as it is, the flexibility of being able to build reusable Machine Learning Pipelines in which you can make your feature generation part of the Meta-Parameters, will make it all worthwhile in the end.

So, to this end, here is a little bit of re-usable code that will help with one common data preparation task: Mean Imputation of Missing Values.


If you are lucky enough to be on Spark 2.2.0 then there is a library function you can use to do this. This was lifted directly from this StackOverflow post:

import org.apache.spark.ml.feature._

def imputeMeans(df: org.apache.spark.sql.DataFrame, feet: Array[String]): (org.apache.spark.sql.DataFrame, Array[String]) = {
        val outcols = feet.map(c => s"${c}_imputed")
        val imputer = new Imputer().setInputCols(feet).setOutputCols(outcols).setStrategy("mean")
        val resdf = imputer.fit(df).transform(df)
        (resdf, outcols)
}

Which should be fairly self explanatory, you simply pass the function a dataframe and an array of column names. You will get back a new data frame with additional columns in which the '_imputed' suffix has been added.


If you are on an older version of Spark then you can do the following

def imputeToMean(df: org.apache.spark.sql.DataFrame, col: String): org.apache.spark.sql.DataFrame = {
        val meanVal = df.select(mean(df(col))).collectAsList().get(0).getDouble(0)
        df.na.fill(meanVal, Seq(col))
}

def imputeMeans(df: org.apache.spark.sql.DataFrame, cols: Array[String]): org.apache.spark.sql.DataFrame = {
        cols.foldLeft(df)( (dfin, col) => imputeToMean(dfin, col) )
}

Again the imputeMeans function takes a DataFrame and an array of column names. This time it just returns a new DataFrame in which the required columns have had their NULLs replaced with the column mean. This version can be time consuming to run, so I suggest that you cache it once it is done.

Hope that helps.
Wednesday, September 6, 2017

Apache Spark - Cumulative Aggregations over Groups using Window Functions

There are many tasks you want to perform over a data set that correspond to some form of aggregation over groups of your data, but in a way that takes some kind of ordering into consideration.

For example calculating the cumulative total sales per salesperson over the course of each financial year. You want the data grouped by salesperson and the financial year, but then transformed to calculate the cumulative total up to and including each sale.

These kinds of functions are possible in SQL syntax, but they are complicated, and difficult to read. Apache Spark by comparison has a very elegant and easy to use API for generating these kinds of results.

Here is a simple example in which we want the average sales per salesperson, leading up to and including their current sale.

First lets create a dummy data set and look at it. (In reality you will usually be loading an enormous set from your cluster, but this lets us experiment with the API).

val redy = sc.parallelize(
    Seq((201601, "Jane", 10), (201602, "Tim", 20), (201603, "Jane", 30),
        (201604, "Tim", 40), (201605, "Jane", 50), (201606, "Tim", 60),
        (201607, "Jane", 70), (201608, "Jane", 80), (201609, "Tim", 90),
        (201610, "Tim",  100), (201611, "Jane", 110), (201612, "Tim", 120)
    )
)

case class X(id: Int, name: String, sales: Int)
val redy2 = redy.map( in => X(in._1, in._2, in._3) )
val df = sqlContext.createDataFrame(redy2)

df.show

...and this it what it looks like

+------+----+-----+
|    id|name|sales|
+------+----+-----+
|201601|Jane|   10|
|201602| Tim|   20|
|201603|Jane|   30|
|201604| Tim|   40|
|201605|Jane|   50|
|201606| Tim|   60|
|201607|Jane|   70|
|201608|Jane|   80|
|201609| Tim|   90|
|201610| Tim|  100|
|201611|Jane|  110|
|201612| Tim|  120|
+------+----+-----+

To add our additional column with the aggregation over the grouped and ordered data, it is as simple as:

df.withColumn("avg_sales", avg(df("sales"))
   .over( Window.partitionBy("name").orderBy("id") )
).show


...which will produce the following output:


+------+----+-----+------------------+
|    id|name|sales|         avg_sales|
+------+----+-----+------------------+
|201602| Tim|   20|              20.0|
|201604| Tim|   40|              30.0|
|201606| Tim|   60|              40.0|
|201609| Tim|   90|              52.5|
|201610| Tim|  100|              62.0|
|201612| Tim|  120| 71.66666666666667|
|201601|Jane|   10|              10.0|
|201603|Jane|   30|              20.0|
|201605|Jane|   50|              30.0|
|201607|Jane|   70|              40.0|
|201608|Jane|   80|              48.0|
|201611|Jane|  110|58.333333333333336|
+------+----+-----+------------------+


Voila. An additional column containing the average sales per salesperson leading up to and including the current sale. You can modify this to change the aggregation function, add additional columns to the grouping or the ordering. It is clean and readable, and fast.


Tuesday, May 23, 2017

Inspecting Changed Files in a Git Commit


When you are getting set up with using GIT for data science work you will likely have some teething issues with getting your process and flow right.

One common one is that you have a GIT repo that controls your production code, but you make config changes in the prod code, and code changes in your working copy. If you have not graduated to PULL requests from DEV branches, then you might find yourself unable to push changes made without merging into PROD.

Here are some small things that are useful in understanding what has changed before you flick that switch.

Look at what the commits are that not in your current working version

git log HEAD..origin/master

This will give you something like

commit 30d1cb6a3564e09753078288a9317f1b2309ab81
Author: John Hawkins <johawkins@blahblahblah.com>
Date:   Tue May 23 10:03:10 2017 +1000

    clean up

commit d69a1765bcfa4257573707e9af2bb014c412d7d8
Author: Added on 2016-12-06i <johawkins@blahblahblah.com>
Date:   Tue May 16 05:39:14 2017 +0000

    adding deployment notes

You can then inspect the changes in the individual commits using:

 git show --pretty="" --name-only d69a1765bcfa4257573707e9af2bb014c412d7d8

Which will give you something like

commit d69a1765bcfa4257573707e9af2bb014c412d7d8
Author: Added on 2016-12-06i <johawkins@blahblahblah.com>
Date:   Tue May 16 05:39:14 2017 +0000

    adding deployment notes

drill_udfs/README.md

Note that it will show you the changed files at the end, which is often the most important thing to know. At least this help me understand what I am bringing in.

Tuesday, February 2, 2016

Creating PEM files for an APNS Push Notification Server


If you are curious enough to want to build your own push notification backend system, then you will come to a point in time when you need to get the certificates for your server to communicate with the Apple APNS server. When you start searching the web for tutorials on this subject you will find lots of out of date material showing screen shots from previous versions of iTunes Connect, Xcode or the Key-Chain software.

As of right now the only accurate account I have found is this Excellent Stack Overflow post.

Hope that helps save someone some time.

Saturday, July 4, 2015

Development Process with Git

I have been using various version control tools for years, however it has taken me a long time to make version control a core part of my work process. All of the ideas in this post come from other people... so as usual I am indebted to my colleagues for making me a more productive coder.

I now generally create a repo in my remote master, and then push the initial commit. This requires running the following on you local machine.

git init 
git add *
git commit -m "Initial Commit"
git remote add origin git@remote.com:project.git
git push -u origin master


If you want other people to work with you, then they can now clone the project.

git clone git@remote.com:project.git

Now for the interesting part: when you want to commit something into the repo but your branch has diverged from master. You can of course just run git pull and it will merge the results, unless there are drastic conflicts you need to resolve. But this creates a non-linear commit lineage, you can't look at this list of commits as one single history. To get a linear commit history you need to do the following.

git fetct 
git rebase

This will rewind your commit history to what it was before the changes in master were applied. It will apply the changes from the master branch, and then apply your sequence of changes on top. Voila, linear commit history.

There are a number of other key ideas in effectively using git.

Tag your releases

This is pretty simple, every time I push a major piece of code to production, release an App on the App Store etc, then I make sure to tag the contents of the repository. So that release can be recovered with minimal stuffing around.

git tag -a v1.2 -m 'Version 1.2 - Better than Version 1.1'

Create Branches


Branching can be a scary experience the first time you do it. However, if you want to do major refactorizations of code that is in production and needs to be supported while those changes are being made, then this is the only way to do it. In fact I don't know how people did these before tools like git.

Create a branch and check it out in a single command

git checkout -b refactor
 
  
Go back to master if you need to patch something quickly

git checkout master

When you are done go back to your branch

git checkout refactor

If you changed things in the master that you need inside your refactorization work, then merge master into it:

git merge master

Once you are done with all of your changes, run your tests etc, then your can merge that branch back into your production code.

git checkout master
git merge refactor
 
 
Once it is all merged and deployed, you don't need the branch so delete it.

git branch -d refactor


Wednesday, December 3, 2014

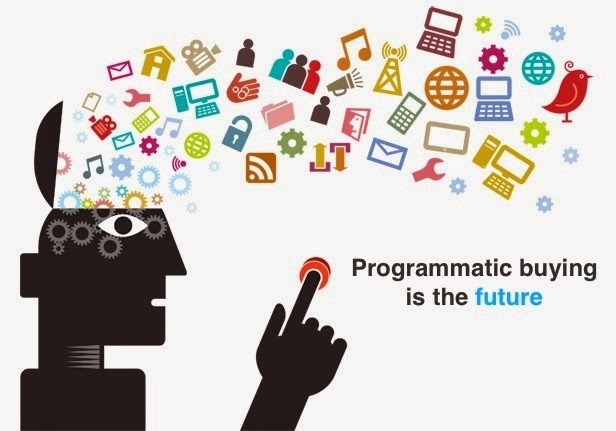
Programmatic is the Future of All Advertising


If you do not have contact with the world of media and advertising you might never have heard the term programmatic. Even if you do it is likely that you have no idea what it means. To put it simply programmatic refers to a radical overhaul in the way advertising is bought and sold. Specifically, it refers to advertisers (or media agencies) being able to bid on ad positions in real time, enabling them to shift ad spend around between publishers at their own discretion.

Understandably many people in the publishing industry are very nervous about this. Advertising has historically been a very closed game, publishers have demanded high premiums for ad spaces that they could provide very little justification for. The digital age has forced them to compete with bloggers, app developers and a multitude of other Internet services that all require ad revenue to survive.

Programmatic began with the rise of text based search ads. Innovators like DoubleClick honed in on the idea that advertisers should be able to pay for what they want (a click), and the AdServer should be able to calculate expected returns for all possible ad-units by looking at the historical click through rate for each ad-unit and the amount being bid. The idea soon moved to display advertising to allow advertisers to bid a fixed cost per thousand ad impressions for display ads (designed for brand awareness more than attracting clicks). Those ideas have now spawned an industry that contains thousands of technology providers and ad networks. All the Ad space from the biggest publishers in the world down to the most obscure bloggers are all available to be bought and sold across a range of different bidding platforms.

Exactly the same thing is starting to happen with digital radio stations and it is coming for billboard displays as well. Some of the new crop of music distribution channels (like Spotify and Pandora) will be rolling out products that allow them to coordinate audio ads and display ads within their apps. Behind the scenes they are developing technology to schedule these things like an online banner ad, and once that happens selling those slots in an online bidding auction that combines audio and display is not far away.

The video ads you see on YouTube and many other publisher sites are already able to be bought this way using tools like TubeMogul. In the not too distant future people will be watching ads on their televisions that are being placed there by the bidding actions of a media buying specialist. US based Ad tech company Turn is already investigating this possibility. Sure there will be latency problems, video and audio are large files, so they will need to be uploaded to an adserver close to where they will be delivered. But these technologies are already being developed to cope with the increasing complexity of display ads with rich media capability.

The rise of programmatic advertising is changing what it means to be a media agency. It is no longer sufficient to build monopoly relationships with publishers and then employ a suite of young professionals who build relationships with brands. Instead, media agencies need a room full of a new kind of media geek that specializes in understanding how to buy media on a variety of platforms called Demand Side Platforms (DSPs).

These new divisions within agencies are called trading desks, they are staffed with people whose job it is to understand all the kinds of media that are available to buy, how much you can expect to pay for it, and what kinds of ads will work where. It is a new job, and to be perfectly honest people still have a lot to learn. That learning curve will only increase, at the moment they are just buying display ads on desktop and mobile. The ad capabilities of mobile will increase as the field matures, and then they will have to deal with buying video advertising and audio. At some point that will spread beyond just YouTube, first to other online video services, then to smaller niche digital TV channels, then to set-top boxes and cable TV. Finally, broadcast television (if it is still in business) will grudgingly accept that they need to make their inventory available.

Before any of this happens, most of the advertising on social networks will have become available programmatically. Facebook is making this transition, and twitter will follow, as will the others. They will each struggle with the balance of keeping their unique ad formats and maximizing the return on their inventory. Everything we have seen in desktop display indicates that this problem can be solved with online auctions, which means fully programmatic social media is coming.

This is an awe inspiring future for digital advertising. The DSP of the far future will be a tool that is able to buy inventory on desktop, mobile web, mobile apps, radio stations, TV channels, electronic billboards and a suite of social media. Ideally it will contain rules that allow the purchase of media between these channels to be co-ordinated and optimized in real time.

For example, imagine a system with configuration rules that allow TV time to be purchased when twitter activity for certain key hashtags reaches threshold volumes (an independent way of checking that TV viewership is what the networks claim it is). Following that with social media advertising, and digital billboards the following morning during the daily commute. The possibilities for marketers to test and learn what actually works will be immense.

When you contemplate the possibilities for investigating and improving ROI using this approach to media planning and spending you really need to ask yourself:

Why would anyone buy advertising the old fashioned way?


Monday, November 10, 2014

Basic Guide to Setting Up Single Node Hadoop 2.5.1 Cluster on Ubuntu


So, you have decided you are interested in big data and data science and exploring what you can do with Hadoop and Map Reduce.

But... you find most of the tutorials too hard to wade through, inconsistent, or you simply encounter problems that you just can't solve. Hadoop is evolving so fast that often the documentation is unable to keep up. 

Here I will run you through the process I followed to get the latest version of Hadoop (2.5.1) running so I could use it to test my Map Reduce programs. 

You can see the official Apache Docs here.


Part One: Java

You need to make sure you have a compatible version of Java on your machine.

Jump into your terminal and type
java -version
You preferably need an installation of Java 7.
When I run this I get:

java version "1.7.0_55"
OpenJDK Runtime Environment (IcedTea 2.4.7) (7u55-2.4.7-1ubuntu1~0.12.04.2)
OpenJDK 64-Bit Server VM (build 24.51-b03, mixed mode)


Part Two: Other Software

You will need ssh and rsync installed. Chances are that they already are, but if not just run:
sudo apt-get install ssh
sudo apt-get install rsync


Part Three: Grab a Release

Head to the Apache Hadoop Releases page, choose a mirror and grab the tarball (.tar.gz). Make sure you do not grab the source file by mistake (src).
Remember: in this walk-through I have grabbed release: 2.5.1

Part Four: Unpack & Configure

Copy the tarball to wherever you want Hadoop to reside. For me I like to put it in the directory
/usr/local/hadoop
and then extract the contents with
tar -xvf hadoop-2.5.1.tar.gz
Then you will need to do some configuration. Open the file
vi hadoop-2.5.1/etc/hadoop/hadoop-env.sh
You will need to modify the line that currently looks like this
export JAVA_HOME=${JAVA_HOME}

You need to point this to your java installation. If you are not sure where that it just run
which java

and then copy the path (minus the bin/java at the end) into the hadoop config file to replace the text ${JAVA_HOME}.


Part Five: Test

First run a quick to check that you have configured java correctly. The following command should show you the version of hadoop and its compilation information.

hadoop-2.5.1/bin/hadoop version

Part Six: Run Standalone

The simplest thing you can do with hadoop is run a map reduce job as a stand alone script.

The Apache Docs give a great simple example: grepping a collection of files.

Run these commands:
mkdir input
cp hadoop-2.5.1/etc/hadoop/*.xml input
hadoop-2.5.1/bin/hadoop jar hadoop-2.5.1/share/hadoop/mapreduce/hadoop-mapreduce-examples-2.5.1.jar grep input output 'dfs[a-z.]+'

When hadoop completes that process you can open up the results file and have a look.
vi output/part-r-00000
You should see a single line for each match of the regular expression. Trying changing the expression and seeing what you get. Now you can use this installation to test your map reduce jars against Hadoop 2.5.1.


Coming Next: Running Hadoop 2.5.1 in Pseudo Distributed Mode